Tamano Cross Guide for Uma Fighters
Expansion roster fighter — disciplined routes, global inputs, and honest ALPHA reads from community showcases.
Tamano Cross is part of Uma Fighters’ [QOL] roster expansion alongside Haru Urara and Rice Shower — community showcases position her as a structured, rhythm-focused fighter who rewards patient confirms over random skill mashing. She uses the same global layout as every character: M1 chain, skills 1–4, F block, R Special, Q dash, G Awaken, and B emotes. Umaniacs has not shipped a finalized public movelist with permanent skill names, so this guide describes combat roles and training habits verified in ALPHA footage without inventing ability titles.
Learn shared systems on Getting Started and Controls first. Compare Tamano Cross to Aurora, The Director, and fellow expansion picks on Characters and the Tier List.
Kit Identity in Community Footage
Early showcases highlight measured footsies — Tamano Cross players win neutral with hit-one M1 probes, then commit skills only when spacing is honest. That pacing sits between Aurora’s all-rounder reliability and Rice Shower’s long combo greed.
| Input | Reported role | Player habit |
|---|---|---|
| M1 | 4-hit chain with strong stagger on early hits | Tap hit one, confirm, then continue |
| Skill 1 | Approach or single-target strike | Dash-in or post-M1 cancel |
| Skill 2 | Mid-range control / spacing tool | Clears paths to corner from Map guide |
| Skill 3 | Punish or defensive answer | After F block or read on dash spam |
| Skill 4 | Finisher with longer recovery | Confirmed routes only |
| R | Special burst or angle shift | Track enemy cooldowns before spend |
| G | Awaken enhancement window | Corner or post-confirm activation |
Tamano Cross punishes impatient opponents who treat every fighter like a rushdown — read PvP Tips for neutral discipline that matches her kit.
M1 Fundamentals
Every Tamano Cross route starts with honest M1 hit one:
- Probe at mid range — do not full chain on block.
- Continue M1 only while hitstun is visible.
- Cancel the last hit into Skill 1 or Skill 4 depending on wall distance.
- Reset with Q back dash if pushback is wrong.
Daily drill (5 minutes): alternate hit-one stop and full-chain cancel labs. Universal cancel timing lives in the Combos Guide.
Skills 1–4 — Role-Based Breakdown
Skill 1 (approach band): Showcase players use this after M1 confirm or a whiff punish dash. Casting Skill 1 at max range is the fastest way to lose neutral on any fighter — Tamano Cross included.
Skill 2 (space band): Functions as mid-field control in many clips — keeps opponents from resetting after a short M1 string. Pair with corner pathing: walk them toward hard walls before spending Skill 2 recovery.
Skill 3 (punish band): Mental slot similar to Aurora’s counter-style answers. Hold F against obvious M1 or Q spam, then respond. Raw Skill 3 in neutral gets blocked and punished by Director money tools.
Skill 4 (finisher band): Highest damage potential, longest whiff punish. Only fire after confirm or during Awaken when opponent Q is down.
R Special: Sits outside the 1–4 bar — use for burst when you read a block release or exhausted dash. Good opponents track R cooldown; do not autopilot it every neutral.
Awaken on G
Tamano Cross Awaken clips show enhanced confirm windows rather than entirely new inputs — similar philosophy to Aurora and Rice Shower. Press G when:
- Opponent burned Q and you have corner or wall advantage
- You confirmed M1 into Skill 1 with visible hitstun left
- Director whiffed a money skill — punish into Awaken extension
Avoid G when:
- Full neutral at long range
- Opponent holds F with Q ready to stall
- You are low health without reading their burst cooldowns
Deep meter strategy: Ultimate Mode Guide. Awakening Outfits gamepass is visual-only.
Matchup Notes
vs Aurora
Aurora wins simple trades with Skill 3 reads. Tamano Cross must respect block and feint with dash backs.
- Win condition: out-space with Skill 2, confirm hit one, carry to corner
- Loss condition: forcing Skill 4 on F — Aurora punishes recovery
Mirror Aurora habits from the Aurora Guide.
vs The Director
Director summons and money attacks clutter neutral reads.
- Win condition: punish whiffed paid skills; keep routes short when bodyguards spawn
- Loss condition: chasing summons while economy refills
Economy details: Director Guide.
vs Haru Urara
Both expansion fighters push forward pressure — fights become confirm races.
- Whoever lands hit one cleanly owns the string
- Do not Awaken first in neutral without corner
Pressure pacing: Haru Urara Guide.
vs Rice Shower
Rice Shower wants longer strings; Tamano Cross wants cleaner, shorter routes.
- Interrupt Rice Shower mid-string with well-timed F and Skill 3 answers
- Do not get greedy chasing every wallbounce — Rice Shower excels there
Combo depth: Rice Shower Guide.
Training Plan (20 Minutes)
- 5 min — M1 hit-one confirms only, no skills.
- 5 min — last-hit cancels to Skill 1 and Skill 4 at different ranges.
- 5 min — block (F) → Skill 3 punish on dummy attacks.
- 5 min — one Awaken route when dummy Q is “spent” mentally.
Add 10 minutes PvP with a single goal: three corner confirms without burning G early.
Mobile players: rehearse on Mobile Guide before ranked — measured footsies are harder on touch.
ALPHA Expectations
Tamano Cross shipped during [QOL] Uma Fighters [ALPHA] rapid growth (Roblox updated August 4, 2026; visits ~1.54M). Hitstun, unlock rules, and tier placement can change weekly. Re-test routes after every Updates entry — especially silent combat tweaks during polish passes.
Codes, Carats, and Cosmetics
Skill is free. Redeem RELEASE for 250 Carats via Enter Codes in the Purchase Carats menu — details on Codes. Gamepasses add emotes and outfits, not frame data.
Video Walkthrough
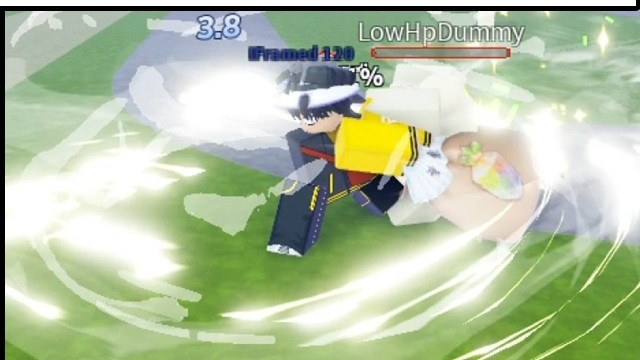
The embedded showcase shows Tamano Cross neutral, skill cancels, and Awaken timing in live lobbies. Pause when confirms fail and verify hit one was true before blaming the character.
Related Guides
- Characters — roster overview
- Combos Guide — universal M1 rules
- Tier List — meta as expansion settles
- Haru Urara Guide — fellow expansion fighter
- Rice Shower Guide — combo-heavy contrast
- PvP Tips — neutral discipline
- Updates — QOL patch notes
Frequently Asked Questions
Quick answers to the most common questions.
Is Tamano Cross good for beginners?
She teaches measured footsies but punishes impatient skill mashing. Aurora remains the best first fighter. Pick Tamano Cross after M1 confirms and block punishes feel natural.
How does Tamano Cross differ from Rice Shower?
Showcases portray Rice Shower as combo-long with extended strings. Tamano Cross favors shorter, disciplined routes and strong neutral hit-one probes.
When should Tamano Cross use Awaken?
Press G after M1 into Skill 1 confirm with corner advantage, or when the opponent burned Q. Avoid awakening at max neutral range.
Are Tamano Cross skill names final?
Not guaranteed during ALPHA. This guide uses Skill 1–4 and R/G roles until Umaniacs publishes official movelist strings.
How does Tamano Cross beat The Director?
Punish whiffed money attacks, ignore summon chase bait, and keep combos short when bodyguards clutter space.
Will Tamano Cross tier placement change?
Yes — expansion roster tier data is volatile. Check the Tier List after each QOL patch for community consensus updates.